ThinkPHP 学习笔记
官方文档: ThinkPHP 官方手册 v6
本笔记来自之前刚开始学习 TP6 时做的笔记,
以前整理的,之后应该不会更新了
TP3 使用经验总结
本来以为不会再更新,奈何公司有 TP 的项目,偶尔遇到问题看官方文档也容易一头雾水,所以在这里记录下看文档时遇到的问题及知识点吧。
实用知识点
模块化设计
tp3 允许自动生成模块目录,只需要在入口文件中,加上一句
define('BIND_MODULE','NewModuleName');即可;如果存在空的
NewModuleName目录,tp3 会报错,所以先确保目录不存在
命名空间和自动加载
TP3 中自动加载是通过ThinkPHP/Library/Think/Think.class.php文件中的autoload方法实现的。
如何注册新的命名空间
在自动加载文档中,允许注册新的命名空间,但文档讲的不是很明白,这里补充下细节:
需要在
Common/Conf/config.php中的AUTOLOAD_NAMESPACE中添加新的命名空间;php'AUTOLOAD_NAMESPACE' => array( 'One' => THINK_PATH.'One', ),然后在
ThinkPHP下新建一个One文件夹,里面放入类文件,比如IpLocation.class.php,这个类文件的命名空间就是One;之后就可以在项目中使用了:
php$ip = new \One\IpLocation();要注意的是
IpLocation这个类的命名空间是One,所以在类文件中要加上命名空间:phpnamespace One;
内置函数
TP3 提供了一些内置函数,可以在项目中使用,比如C函数,I函数等。
函数代码主要的位置在 ThinkPHP/Common/functions.php 和 ThinkPHP/Mode/Api/functions.php 中。
以下是一些常用的内置函数:
C: 用于获取配置信息,比如C('DB_NAME')I: 用于获取输入数据,比如I('get.id')dump: 用于页面友好的打印数据,比如dump($data)get_client_ip: 用于获取客户端 IP 地址
视图模版
开启模版主题
默认情况下,没有开启模板主题功能,如果需要开启,设置 DEFAULT_THEME 参数即可:
'DEFAULT_THEME'=>'blue'这样模版文件就会比之前多一层目录,变成这样:
View/blue/Index/index.html之后就可以动态更改模版主题了:
$this->theme('blue')->display('index');
模版赋值
系统提供了 assign 方法对模板变量赋值,无论何种变量类型都统一使用 assign 赋值:
$this->assign('name',$value);输出多个模版变量时可以用数组,比如:
$this->assign(array('name1'=>$value1,'name2'=>$value2));
TP6 使用经验总结
日志处理
可以在日志的配置中,单独添加一个 channel,来实现不同的日志记录。
'channels' => [
    'sql' => [
        'driver' => 'file',
        'path' => app()->getRuntimePath() . 'sql',
        'size' => 1024 * 1024 * 100,
        'level' => 'debug',
    ],
],
在日志的配置中,可能有些字段不太明白,可以参考下面的解释:
apart_level:独立记录的日志级别,在这个列表中的日志级别会单独记录,有独立的日志文件,不会记录到主日志文件中;如果是
true,则表示所有级别都会单独记录。single:默认是按天生成日志文件,如果设置为true,则表示都会记录到一个文件中,默认名为single.log,如果设置为字符串,则表示文件名。
EasyAdmin 后台管理系统
我们公司目前内部在用的系统,在这里也记录下使用经验(不推荐使用)。
官方文档网站已经打不开了,我镜像了一份,可以在这里查看:EasyAdmin 官方文档
admin_source/app/common/constants/MenuConstant.php定义了首页的 PID,可以通过修改这个来设置默认打开的页面admin_source/public/static/plugs/easy-admin/easy-admin.js定义了一些全局的 JS 方法,可以通过修改这个来实现一些全局的功能
下面为历史笔记内容,而我是一条无情的分割线。
安装 TP6 并开启调试
本地安装部署 ThinkPHP 6.x
安装 Composer
Composer 官网,你可以自行前去下载,也可以直接下面链接下载:
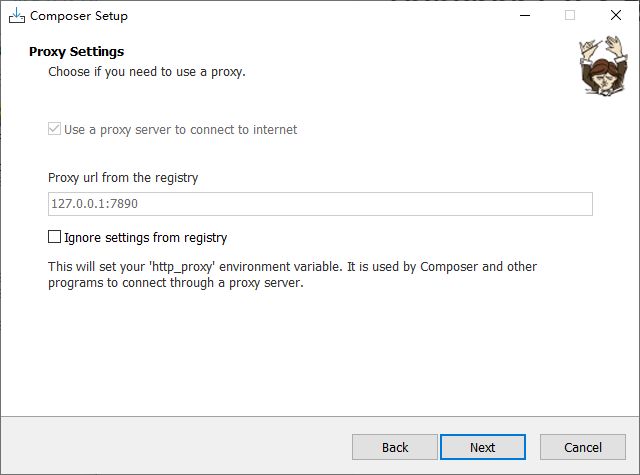
接下来就是点击Next就可以完成安装。
使用国内镜像(阿里云)
由于众所周知的原因,国外的网站连接速度很慢。因此安装的时间可能会比较长,我们建议使用国内镜像(阿里云)。
打开命令行窗口(windows 用户)或控制台(Linux、Mac 用户)并执行如下命令:
composer config -g repo.packagist composer https://mirrors.aliyun.com/composer/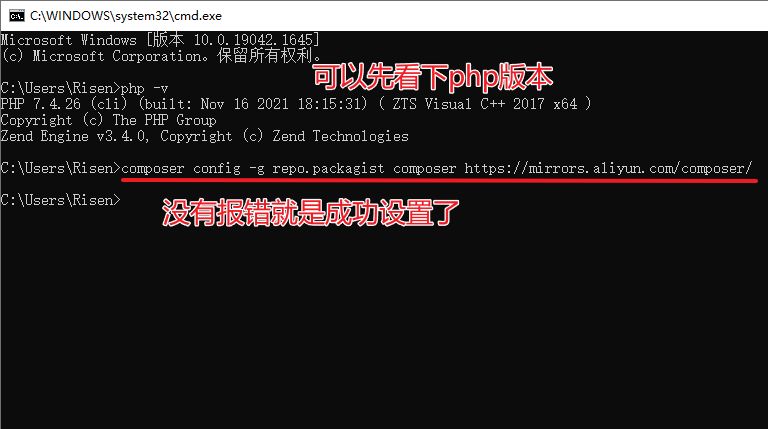
接下来就可以准备部署 ThinkPHP 6.x
这个时候请先打开本地的 php 开发环境
安装 ThinkPHP 6.x
首先我们需要进入我们要安装 TP6.x 的文件目录。
可以还是在命令行中操作。
通过使用cd ..来回到上一集目录;
通过使用cd path来访问目录。
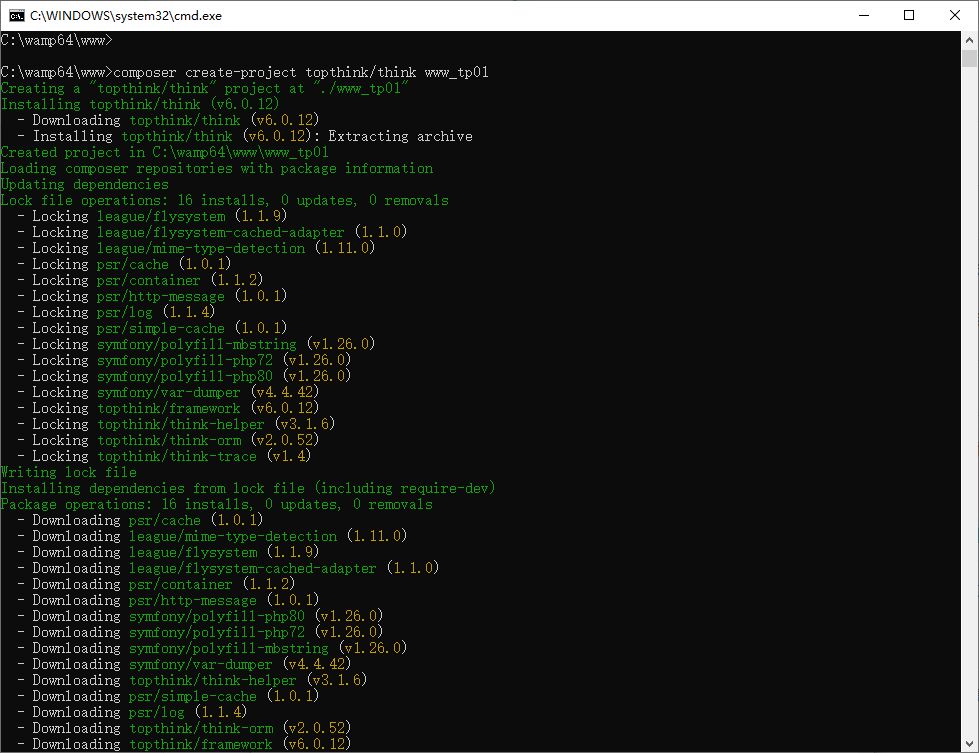
访问到 web 根目录下面,执行下面命令即可开始安装:
composer create-project topthink/think tp这里的tp目录名你可以任意更改,这个目录就是我们后面会经常提到的应用根目录。
可以参考我的:
C:\Users\Risen>cd ..

C:\Users>cd ..

C:\>cd wamp64\www

C:\wamp64\www>composer create-project topthink/think www_tp01我们这里安装的是稳定版。
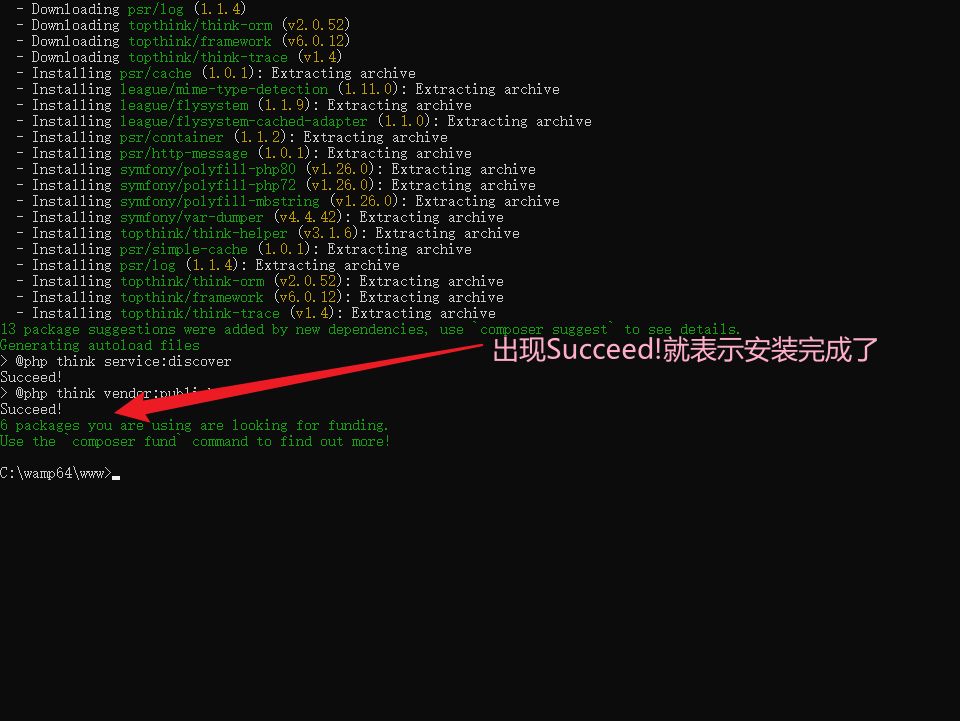
如果有报错,或者你想升级版本,可以进入刚刚安装的 web 目录下,执行下面命令进行更新:
composer update topthink/framework访问 ThinkPHP 6.x
现在我们就部署好了 ThinkPHP 6.x。
接下来我们更改下网站目录为public,即可访问网站了。
我这里直接改下 Apache 的虚拟 host,然后重启下 Apache 即可。
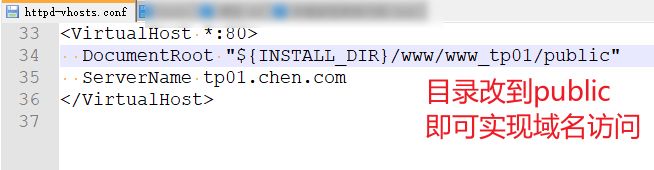
改好配置,然后直接域名访问即可正确打开。
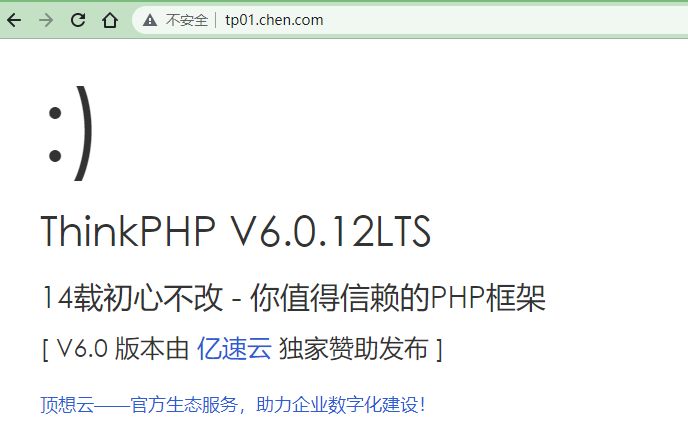
现在就完成了 ThinkPHP 的本地部署了。
开启调试模式
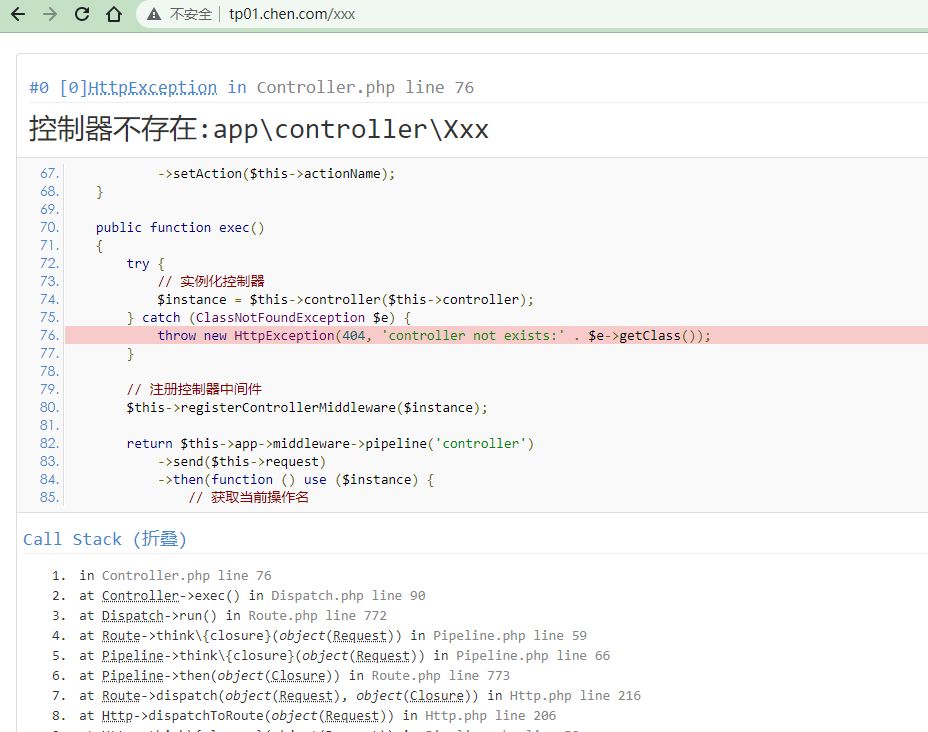
默认情况下,如果访问错误,是没有任何提示信息的。
就像下面这样:
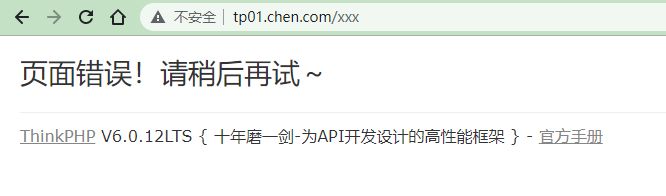
我们通过开启调试模式,来显示更多信息,方便我们找到问题,并做调整。
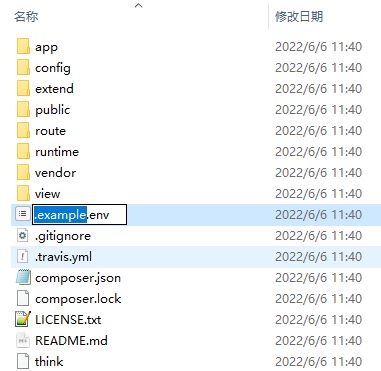
开启也特别简单,只要到网站目录下,找到.env的文件,把前面的.example删掉皆可。
删掉后,我们再访问刚才的错误页面,就可以看到完整的错误信息了:
首页右下角也会显示 ThinkPHP 的标志:
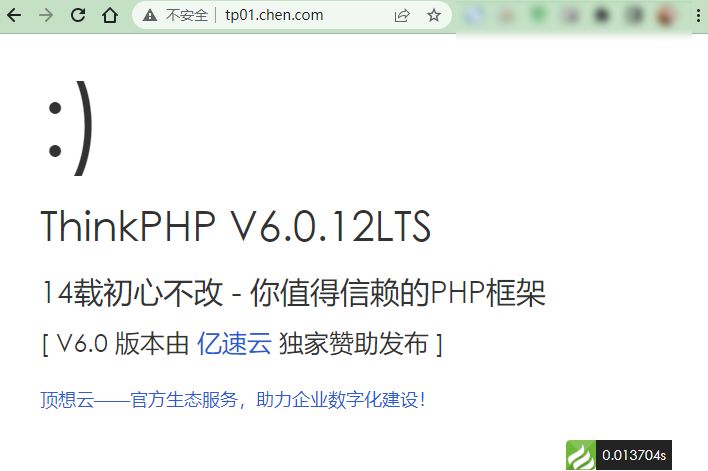
此时就表示我们已经正确开启了调试模式。
如果需要关闭调试模式,只要打开.env文件,把第一句的True改成false即可。
事实上,在config下的很多php文件中,也可以看到显示错误信息的开关。
这个是可以显示简单的调试信息的。
.env 环境变量仅用于本地开发测试,部署后会被忽略。
部署到服务器后,只会获取到 config 下的配置文件。
(还蛮科学的!毕竟本地的数据库网站、域名都仅仅用于测试开发,和实际部署的信息会有很大的差异,这样每次部署都不用特意修改这些配置)
URL 访问模式
URL 解析
1、ThinkPHP 框架非常多的操作都是通过 URL 来实现的;
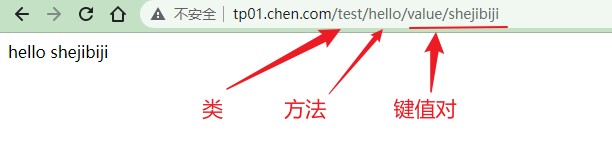
2、多应用:http://serverName/index.php/应用/控制器/操作/参数/值...
3、单应用:http://serverName/index.php/控制器/操作/参数/值...
4、由于 TP6.0 默认是但应用模式,多应用需要作为扩展安装,避免混乱展示搁置;
5、index.php 这个文件,是根目录下 public/下的 index.php(入口文件);
6、**控制器:**app 目录下有一个 controller 控制器目录下的 Test.php(控制器),类名也必须是class Test,否则错误;
7、操作就是控制器类里面的方法,比如:index(默认面写)或 hello(必写);
例如:
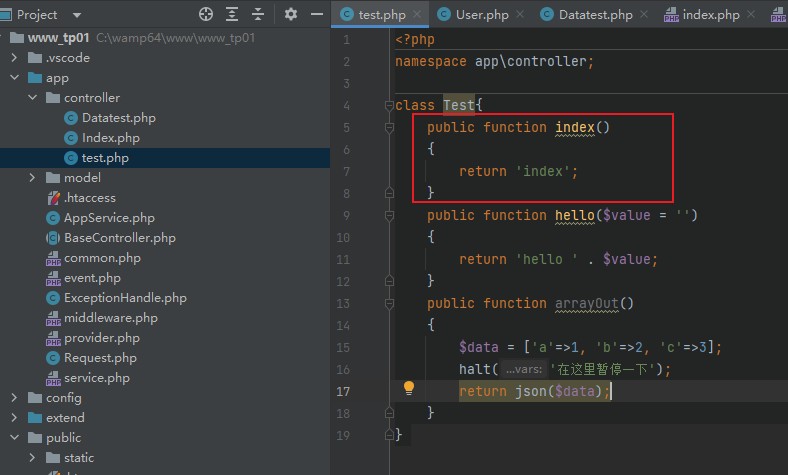
就可以通过地址:
http://你的域名/test访问,并返回index
访问:http://你的域名/test/hello/value/shejibiji
返回:hello shejibiji
上面的操作省略掉了 index.php
如果不行,可能是因为服务器没有开启重写。
我们可以打开 web 服务器配置文件,开启mod_rewrite.so模块,并将AllowOverride None的None改为All皆可。
连接数据库
连接数据库
- ThinkPHP 采用内置抽象层将不同的数据库操作进行封装处理;
- 数据抽象层基与 PDO 模式,无须针对不同的数据库编写相应的代码;
- 使用数据库的第一步,就是连接你的数据库;
- 在根目录的 config 下的 database.php 可以设置数据库连接信息;
- 大部分系统已经给了默认值,你只需要修改和填写需要的值即可;
- ⭐ 本地测试,会优先采用
.env的配置信息,我们和database配置对应上即可; - 可以通过删除修改
.env的配置,或删除.env来验证 database 的执行优先级; - 在 database.php 配置中,default 表示设置默认的数据库连接;
- connections 配置数据库连接信息,可以是多个数据库,便于切换;
- 默认的数据库连接名称为:‘mysql’,再复制一组数据库连接信息:‘demo’切换;
- 创建一个用于测试数据库连接的控制器:‘DataTest.php’;
测试数据库连接(对应上面 5&6 点)
我们在app/controller下新建一个DataTest.php,然后在其中输入以下代码,然后浏览器输入:http://域名/datatest,即可访问到数据库数据信息。
<?php
namespace app\controller;

use think\facade\Db;

class DataTest{
    public function index()
    {
        $user = Db::table('tp_users')->select();
        return json($user);
    }
}
多个数据库(对应上面第 9 点)
我们可以在database.php信息里面,放入多个数据库连接信息,比如这样:
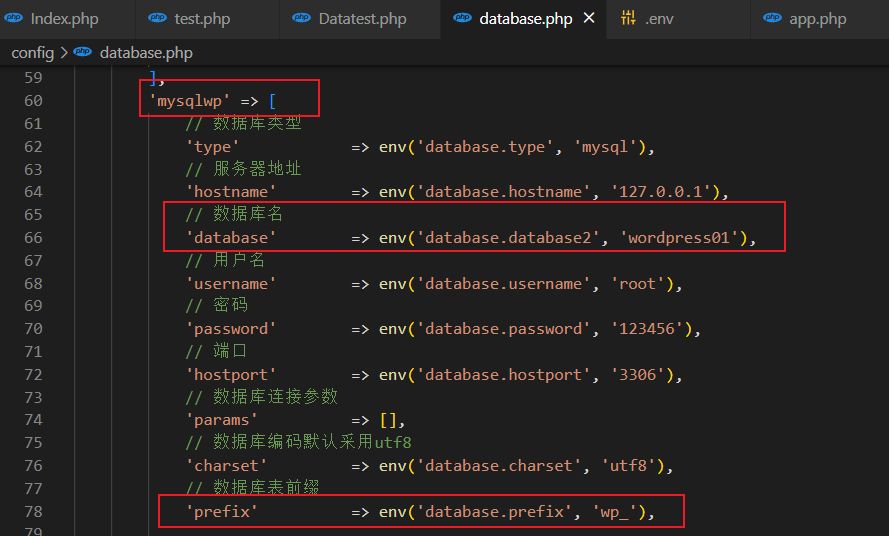
然后我们在测试的文件中加一个 function,名字为 demo:
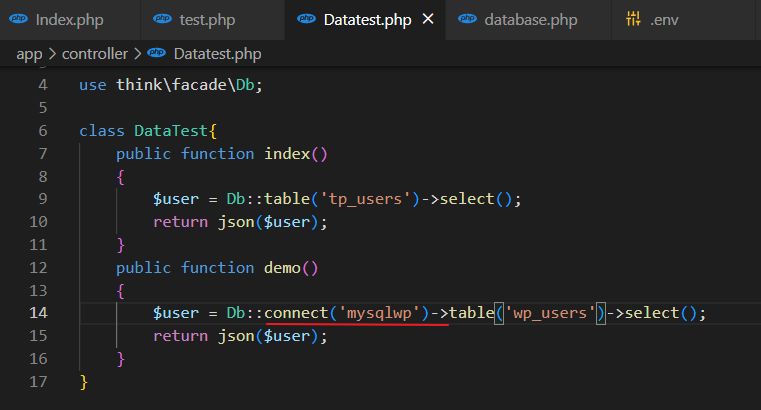
浏览器输入:http://域名/datatest/demo,就可以连接到新的数据库了。
初探模型
模型就是和数据库直接打交道的一个类。
1、在 app 目录下,创建一个model目录,用于创建User.php的模型类:
namespace app\model;
use think\Model;

class User extends Model
{
    protected $connection = 'mysql';
}
2、User 继承模型基类,即可实现数据调用。
3、受保护的字段$connection,这是切换到 demo 数据库;
4、控制器端的调用方式如下:
public function getUser()
{
    $user = User::select();
    return $user;
}
(测试没有成功,之后看学完模型是否可以解决)
具体原理后面会详解。
控制器
控制器的定义
1、控制器,即 controller,控制器文件存放在 controller 目录下;
2、如果想改变控制器默认目录,可以在config下route.php配置;
3、类名和文件名大小写要保持一致,并采用驼峰式(首字母大写)
namespace app\controller;
class Test{...}
4、从上面两段代码得知 Test.php 的实际位置为:app\controller\Test.php
5、在 Test 类创建两个方法 index(默认)和 hello,访问 URL 如下:
http://localhost/test
http://localhost/test/hello6、如果是双字母组合,比如class HelloWorld,访问 URL 如下:
http://localhost/HelloWorld/hello
http://localhost/Hello_World/hello
渲染输出
1、ThinkPHP 直接采用 return 返回的方式直接输出;
2、可以采用 json 函数,输出 json;
3、不推荐使用包括die、exit在内的中断代码,推荐使用助手函数halt()。
halt('中断测试');
例如:
public function arrayOut()
    {
        $data = ['a'=>1, 'b'=>2, 'c'=>3];
        halt('在这里暂停一下');
        return json($data);
    }
数据库的数据查询
数据库的查询
一、单数据查询
1、Db::table()中table必须指定完整数据表;
2、如果希望只查询一条数据,可以使用find()方法,需置顶 where 条件;
$user = Db::table('tp_users')->where('id', 2)->find();
return json($user);
//返回数组,需要json格式化,不然无法显示3、Db::getLastSql()方法,可以得到最近一条 SQL 查询的原生语句;
4、没有查询到任何值,则返回 null;
5、使用findOrFail()方法同样可以查询到一条数据,在没有数据时抛出一个异常;
$user = Db::table('tp_users')->where('id', 3)->findOrFail();
return json($user);
//会抛出异常,而不是返回null6、使用findOrEmpty()方法也可以查询到一条数据,但在没有数据时返回一个空数据。
二、数据集查询
1、想要获取多列数据,可以使用select()方法;
2、默认返回空数组,使用selectOrFail()抛出异常;
3、在select()方法后再使用toArray()方法,可以将数据集对象转化为数组;
默认是数据集:
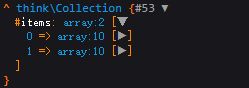
代码链式方法中加入toArray(),改为这样:
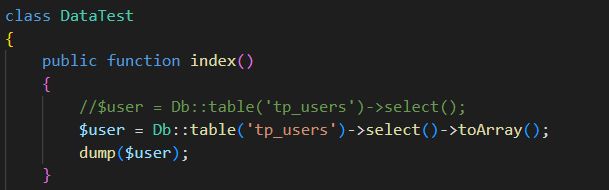
输出后结果为数组。
4、当在数据库配置文件中设置了前缀,那么我们可以使用name()方法忽略前缀:(⭐ 推荐这种)
$user = Db::name('users')->select();
//等同于之前的$user = Db::table('tp_users')->select()
return json($user);
三、其它查询
1、通过value()方法,可以查询指定字段的值(单个),没有数据返回null;
$user = Db::name('users')->where('id', 1)->value('user_login');
//不加where筛选,会显示最后一个值
return json($user);2、通过column()方法,可以查询指定列的值(多个),没有数据返回null;
3、可以置顶 id 作为列值的索引;
$user = Db::name('users')->column('user_login', 'id');
//id记得要单引号括起来,不然会报错
如果处理的数据量巨大,成百上千那种,一次性读取有可能导致内存开销过大。
我们可以使用两种方法解决这个问题:
4、chunk()方法分批处理数据;
Db::name('users')->chunk(1, function($users){
    foreach($users as $user){
        dump($user);
    }
});
// 1表示每次处理1条数据,可以设定大一些5、cursor()游标查询功能,利用了 PHP 生成器特性,每次查询只读一行,然后再读取时,自动定位到下一行继续读取。(⭐ 推荐这种!处理非常快!)
例:
$cursor = Db::name('users')->cursor();
foreach($cursor as $user){
    dump($user);
}
数据库的链式查询
查询规则
1、前面课程中我们通过指向符号“->”多词连续调用方法称为:链式查询;
2、当Db::name('user')时,返回查询对象(Query),即可连缀数据库对应的方法;
3、而每次执行一次数据库查询方法时,比如where(),还将返回查询对象(Query);
4、只要还是数据库对象,那么就可以一直使用指向符号进行链式查询;
5、再利用 find()、select()等方法返回数组(Array)或者数据集对象(Collection);
6、而 find()和 select()是结果查询方法(放在最后),并不是链式查询方法;
7、除了查询方法可以使用链式连贯操作,CURD 操作也可以使用。
通俗来说就是可以使用多个链式,来增加条件,然后使用结果查询方法返回想要的数据。
更多规则还可以在官方手册继续学习。
更多查询
1、如果多次使用数据库查询,那么每次静态创建都会生成一个实例,造成浪费。
我们可以把对象实例保存下来,再进行反复调用即可:
$userQuery = Db::name('user');
$dataSelect = $userQuery->order('id', 'desc')->select();
2、当同一个对象实例第二次查询后,会保留第一次查询的值。
我们可以使用 removeOption()方法,可以清理掉上一次查询保留的值:
$data1 = $userQuery->order('id', 'desc')->select(); //以id倒序排序数据
$data2 = $userQuery->select(); //我们重新赋值,这次没有倒序
return json($data2); //但是结果还是倒序,这就是因为第一次查询被保留的结果
// 我们修改程序成下面这个即可解决问题
$data1 = $userQuery->order('id', 'desc')->select();
$data2 = $userQuery->removeOption('order')->select(); //无脑清除即可
return json($data2);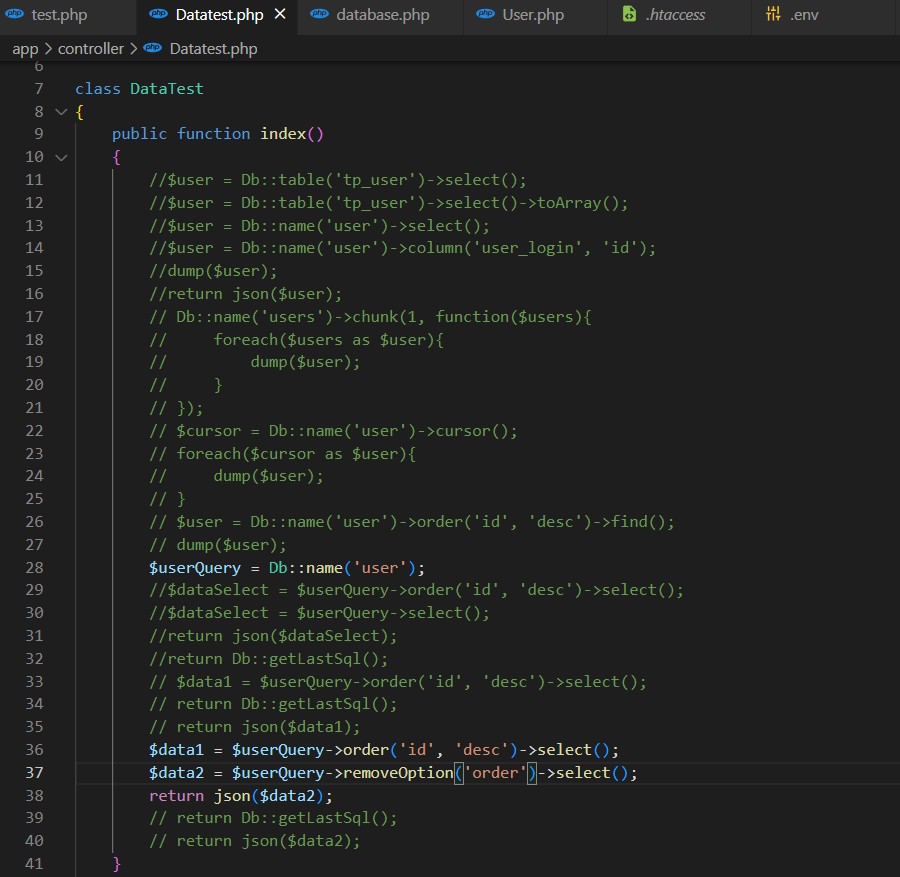
数据库的数据新增和删除
数据库的数据新增
单数据新增
1、使用insert()方法可以向数据表添加一条数据,更多的字段采用默认;
2、如果新增成功,insert()返回一个 1 值;
3、如果里添加一个不存在的字段数据,会抛出一个异常 Exception;
数据表中不存在的字段
4、如果你强行新增抛弃不存在的字段数据,则使用strick(false)方法,忽略异常;
5、如果我们采用的数据库是 mysql,可以支持 replace 写入;
6、insert 和 replace 写入的区别,前者表示表中存在主键相同则报错,后者则修改;
例如:
    public function insert()
    {
        $data2 = [
            'user_login' => 'user4',
            'user_pass' => '123456',
            'user_nicename' => 'user5_nice',
            'user_email' => 'user5@qq.com',
            'user_registered' => '2022-06-04 15:25:38',
            'display_name' => 'user5_nice'
        ];
        $userQuery = Db::name('user');
        $data1 = $userQuery->replace()->insert($data2);
        return Db::getLastSql();
}7、使用insertGetId()方法,可以在新增成功后返回当前数据 ID。
save()新增
1、save()方法是一个通用方法,可以自行判断是新增还是修改(更新)数据;
2、save()方法判断是否为新增或修改的依据为:是否存在主键,不存在即新增。
批量数据新增
1、使用insertAll()方法,可以批量新增数据,但要保持数据结构一致;
使用方法就是上例中,把 inser 换为 insertAll
2、批量新增也支持replace()方法,添加后改变成replace into;
数据库的数据修改
1、使用update()方法来修改数据,修改成功返回影响行数,没有修改返回 0;
2、如果修改数据包含了主键信息,比如 id,那么可以省略掉where条件;
3、如果想让一些字段修改时执行 SQL 函数操作,可以使用exp()方法实现;
4、如果要自增/自减某个字段,可以使用inc/dec方法,并支持自定义步长;
例如:
// 两个例子对应上面的3&4点
public function update()
    {
        $userQuery = Db::name('user');
        return $userQuery->where('ID', 3)
                         ->exp('user_email', 'UPPER(user_email)') //字母大写
                         ->update();

        $userQuery = Db::name('user');
        return $userQuery->where('ID', 3)
            ->inc('user_status', 2)
            ->update();
}5、一个更加简单粗暴灵活的方式,使用::raw()方法实现 3,4 点的内容;
例如:
public function update()
    {
        $userQuery = Db::name('user');
        return $userQuery->where('ID', 4)
            ->update([
                'user_email' => Db::raw('UPPER(user_email)'),
                'user_status' => Db::raw('user_status - 2')
            ]);
}6、使用save()方法进行修改数据,这里必须指定主键才能实现修改功能。
例如:
public function update()
    {
        $userQuery = Db::name('user');
        return $userQuery->where('ID', 5)
                         ->save(['user_login' => 'user5']);
    }
数据库的数据删除
1、可以根据主键直接删除,删除成功返回影响行数,否则为 0;
2、根据主键,还可以删除多条记录;
例如:
public function del()
    {
        $userQuery = Db::name('user');
        return $userQuery->delete([7, 8, 9]);
    }
// 只删除一条的话,只要填入数字,无需数组形式3、正常情况下,通过where()方法来删除;
4、通过true参数删除数据表所有数据,谨慎操作!
例如:
public function del()
    {
        return Db::name('user2')->delete(true);
    }
数据库的数据 EXP 查询及时间查询
查询方式主要有:比较查询、区间查询、EXP 查询等。
数据查询
比较查询
1、查询表达式支持大部分常用的 SQL 语句,语句格式如下:
where('字段名','查询表达式','查询条件');在查询数据进行筛选时,我们采用 where()方法,比如 id=80;
2、使用<>、>、<、>=、<=可以筛选出格中适合比较值的数据列表;
public function query()
    {
        $userQuery = Db::name('user');
        return $userQuery->where('id', '<>', 2)->select();
    }
// '<>'这个符号表示不等于
区间(模糊)查询
1、使用like表达式进行模糊查询;
2、like表达式还可以支持数组传递进行模糊查询;
public function query()
    {
        $userQuery = Db::name('user');
        return $userQuery->where('user_email', 'like', ['svip2011%', 'svip2012%'], 'or')->select();
}3、like表达式具有两个快捷方式whereLike()和whereNoLike();
4、between表达式具有两个快捷方式whereBetween()和whereNotBetween();
5、in表达式具有两个快捷方式whereIn()和whereNotIn();
6、null表达式具有两个快捷方式whereNull()和whereNotNull();
Db::name('user')->where('uid', 'null')->select();
//相当于
Db::name('user')->whereNotNull('uid')->select();
EXP 查询
1、使用exp可以自定义字段后的 SQL 语句;
也就是意味着你可以自己拼装后面的 SQL 语句
public function query()
    {
        $userQuery = Db::name('user');
        $data = $userQuery->where('id', 'exp', 'IN(1,3,4)')->select();
        return json($data);
    }
//也可以直接whereExp()快捷方式,就不用再条件里面写'exp'了
时间查询
传统方式
1、可以使用>, <, >=, <=或者between来筛选匹配时间的数据;
例如:
public function time()
    {
        $userQuery = Db::name('user');
        $user = $userQuery->where('user_registered', 'between', ['2018-01-01', '2021-12-30'])->select();
        return json($user);
    }
not between即为between的方向操作
快捷方式
1、时间查询的快捷方式为whereTime(),直接使用>, <, >=, <=;
2、快捷方式也可以使用between和not between;
例如:
public function time()
    {
        $userQuery = Db::name('user');
        $user = $userQuery->whereTime('user_registered', 'between', ['2018-01-01', '2021-12-30'])->select();
        return json($user);
}3、还有一种快捷方式为whereBetweenTime()和whereNotBetweenTime();
这个就不用以数组的形式传入开始和结束时间,直接以字符串传入即可。
4、默认的条件为大于>,可以省略。
固定查询
1、使用whereYear查询今年的数据、去年的数据和某一年的数据:
public function time()
    {
        $userQuery = Db::name('user');
//        $user = $userQuery->whereYear('user_registered')->select();
//        $user = $userQuery->whereYear('user_registered', 'last year')->select();
        $user = $userQuery->whereYear('user_registered', '2019')->select();
        return json($user);
}2、使用whereMonth查询当月的数据、上月的数据和某一个月的数据;
3、使用whereDay查询今天的数据、昨天的数据和某一天的数据。
其它查询
1、查询指定时间的数据,比如两小时内的:
Db::name('user')->whereTime('create_time', '-2 hours')->select()2、查询两个时间字段时间有效期的数据,比如会员开始到结束的期间;
Db::name('user')->whereBetweenTimeField('start_time', 'end_time')->select()数据库的聚合、原生及子查询
聚合查询
系统提供的一系列方法来方便查询整合数据。
1、使用count()方法,可以求出说查询数据的数量;
2、count()可设置指定 id,比如有空值(Null)的 uid,不会计算数量;
大概意思就是会排除掉指定 id 为空的数据
3、使用max()方法,求出所查询数据字段的最大值;
4、使用max()方法,求出的值不是数值,则通过第二参数强制转换;
(意义不大,可忽略)
Db::name('user')->max('price', false);
5、使用min()方法,求出所查询数据字段的最小值,也可以强制转换;
6、使用avg()方法,求出所查询数据字段的平均值;
7、使用sum()方法,求出所查询数据字段的总和;
子查询
1、使用fetchSql()方法,可以设置不执行 SQL,而返回 SQL 语句,默认 true;
用这个就可以实现快速控制返回的是 SQL 语句还是查询结果,下面的也是同样的效果
2、使用buildSql()方法,也是返回 SQL 语句,不需要再执行select(),且有括号;
⭐ 拼接查询要用到
public function poly()
    {
        $userQuery = Db::name('user');
        $user = $userQuery->buildSql();
        return json($user);
    }
//>>> 运行结果
//"( SELECT * FROM `tp_user` )"

//如果用1的方法,结果会略有区别
//>>> 运行结果
//"SELECT * FROM `tp_user`"
3、可以结合以上方法,实现复杂的子查询(拼接 SQL 语句);
public function poly()
    {
        $subQuery = Db::name('users')->field('id')->where('user_login', 'cshengs')->buildSql();
        $result = Db::name('usermeta')->where('user_id', 'exp', 'IN' . $subQuery)->select();
        return json($result);
    }
//数据表来自wordpress,通过这个就可以查看所有与用户名cshengs相关的用户配置资料
4、推荐使用闭包的方式,执行子查询。
上面的例子就可以改成:
public function poly()
    {
        $result = Db::name('usermeta')->where('user_id', 'in', function($query){
            $query->name('users')->field('id')->where('user_login', 'cshengs');
        })->select();
        return json($result);
    }
// $query相当于Db::
原生查询
这个就是直接执行你写的 SQL 语句
1、可以使用query()方法,进行原生 SQL 查询,适用于读取操作,SQL 错误返回 false;
例如:Db::query('select * from wp_user');
2、使用execute方法,进行原生 SQL 更新写入等,SQL 错误返回 false;
链式查询方法
主要包括:where、field、
where
1、表达式查询,就是where()方法的基础查询方式;
public function link01()
    {
        $subQuery = Db::name('users');
        $user = $subQuery->where('id', '<', 6)->select();
        return json($user);
    }
2、关联数组查询,通过键值对来数组键值对匹配的查询方式;
$user = $subQuery->where([
'user_registered' => '2020-01-05 02:08:53'
])->select();
3、索引数组查询,通过数组里的数组拼装方式来查询;
$user = $subQuery->where([
            ['user_registered', '=', '2020-01-05 02:08:53'] //支持更多模糊匹配
        ])->select();
4、将复杂的数组组装后,通过变量传递,将增加可读性;
$map = ['user_registered', '=', '2020-01-05 02:08:53'];
$user = $subQuery->where([$map])->select();5、字符串形式传递,简单粗暴的查询方式,whereRaw()支持复杂字符串格式;
$user = $subQuery->whereRaw('user_registered="2020-01-05 02:08:53"')->select();6、如果 SQL 查询采用了预处理模式,比如id=:id,也能够支持;
$user = $subQuery->whereRaw('id=:id', ['id'=>2])->select();field
1、使用field()方法,可以指定要查询的字段;
public function link02()
    {
        $subQuery = Db::name('users');
        $user = $subQuery->where('id', '<', '10')->field('id,user_registered')->select();
        return json($user);
}2、使用field()方法,给指定的字段设置别名;
$user = $subQuery->where('id', '<', '10')->field(['id', 'user_registered'=>'time'])->select();
// 记得要加中括号[]3、使用withoutField()方法中字段,可以屏蔽要想要不显示的字段;
4、在fieldRaw()方法里,可以直接给字段设置MySQL 函数;
5、使用field(true)的布尔参数,可以显式的查询获取所有字段,而不是*;
6、使用field()方法在新增时,验证字段的合法性;
Db::table('user')->field('title,email,content')->insert($data);即表示表单中的合法字段只有title,email和content字段,无论用户通过什么手段更改或者添加了浏览器的提交字段,都会直接屏蔽。因为,其他所有字段我们都不希望由用户提交来决定,你可以通过自动完成功能定义额外需要自动写入的字段。
alias
使用alias()方法,给数据库起一个别名:
Db::name('user')->alias('a')->select();
路由
开启强制路由后,原始的路由就会失效。
看到路由上增加了pattern([...]),就表示这是限制变量的规则的。
设置全局变量规则,全部路由有效。
(针对它下面的路由有效)
动态路由挺有意思,感觉像套娃
路由到类的方法中,类名是需要完整的地址,相当于从\app\开始写,比如:
Route::rule('dt-<func>', 'app\controller\Datatest@:func');那么输入dt-index,就访问到 Datatest 下面的index方法。
静态方法就别考虑了,反正@都可以访问到动静态方法。
可以用来设定域名限制,支持多个域名。
可以用来支持跨域请求,也可以用来限制某些域名支持跨域。
跨域请求大概的意思,就是允许多个域名请求同一个数据。
分组最大的好处,就是可以一起控制,这样如果需要相同参数,只要写一次就好了,比较方便。
其中的分组 MISS 路由,表示可以单独设置 miss 的方法。
把 miss 方法单独写在控制器下对应的类中来实现。
有了这个就不用在路由配置文件中配置了,可以直接利用注释来实现路由配置。
项目实战
数据表正常要把 id 设置为主键并自增(AI)
1-5 模板渲染
    public function viewtest()
    {
        $number = 8;
        // 读取的是视图根目录下的index.html文件
        return view::fetch('/index', [
            'number'  => $number
        ]);
        // 读取的是视图根目录下index文件夹下的index.html文件
        return view::fetch('index', [
            'number'  => $number
        ]);
        // 不写参数读取的是视图根目录下viewtest文件夹下的index.html文件
        return view::fetch('', [
            'number'  => $number
        ]);
}知识点链接:视图-模板渲染
知识点链接:TT 开发-变量输出
知识点链接:TT 开发-循环标签
2-2 后台登录功能实现
如果引入验证码一直验证都失败,可能是因为 Session 未启用有关。
知识点链接:杂项-Session
2-5 后台登录拦截逻辑
如果管理员登录了,打开后台登录页应该直接跳转到后台,而不是再次登录。
这时候就需要后台登录拦截。
主要有以下两种方式:
1、传统 base 控制器,父类控制器,后台所有控制器都去继承 base 在 base 控制器做登录拦截。
2、应用中间件。👍
因为是应用中间件,需要把middleware.php放到应用目录下。并在中间件middleware.php中引入check类。
2-9 弹出询问框+公告删除方法
我们可以利用$_SERVER['HTTP_REFERER']快速得到返回键(上一步的网址)。
3-1 管理员列表
join
支持的写法:
- 写法 1:[ '完整表名或者子查询'=>'别名' ]
- 写法 2:'不带数据表前缀的表名'(自动作为别名)
- 写法 2:'不带数据表前缀的表名 别名'
知识点链接:链式查询-Join
3-2 公共方法提取
公共方法请统一放到 APP 目录下的 common.php 里面
unset()函数
去掉某个字段,常用于不需要修改密码,传递数据时使用。
内置标签
系统内置标签库的所有标签无需引入标签库即可直接使用。
例如:
<!--这里用到了比较输出,neq表示不等于-->
<!--下句等同于这句:{if $vo.status !== 1}-->
{if condition="$vo.status neq 1"}

<a href="{:url('base/status',array('id'=>$vo.id,'status'=>1,'dbname'=>'admin'))}"><span class='label label-danger radius'>停用</span></a>

{else/}

<a href="{:url('base/status',array('id'=>$vo.id,'status'=>0,'dbname'=>'admin'))}"><span class='label label-success radius'>正常</span></a>

{/if}知识点链接:TT 开发-内置标签
3-4 用户组权限管理
很重要!涉及二三级菜单的实现。
通过以下代码可以实现三级菜单
$categoryData = Db::name('category')->field('id,cate_name,parent_id')->where('parent_id',0)->select()->toArray();
        foreach($categoryData as $k=>$v){
            $categoryData[$k]['children']=Db::name('category')->field('id,cate_name,parent_id')->where('parent_id',$v['id'])->select()->toArray();

            foreach($categoryData[$k]['children'] as $x=>$y){
                $categoryData[$k]['children'][$x]['siblings']=Db::name('category')->field('id,cate_name,parent_id')->where('parent_id',$y['id'])->select()->toArray();
            }
        }

        //可以通过尝试访问多维数组
        halt($categoryData[0]['children'][0]['sibilings']);
implode()函数
我们获取到的规则是数组,我们可以通过 implode() 函数,把数组元素组合为一个字符串再传入数据库。
例如:
 $data['rules']=implode(',',$data['rules']);
// 与之对应的是explode
$rulesArr=explode(',',$authGroupData['rules']);
in_array()函数
in_array() 函数搜索数组中是否存在指定的值。
我们可以用它来判断规则,以此来通过 JS 决定选中框是否被选中。
例如:
// 通过这一段来判断规则中是否有对应的id,如果有则被选中状态
{php}if(in_array($vo['id'],$rulesArr)){echo 'checked';}{/php}知识点链接:PHP implode() 函数
知识点链接:PHP in_array() 函数
3-5 权限节点搜索
搜索功能实现!
(通过传递搜索关键词作为数据表查询条件)
3-8 initialize 中的跳转
重定向redirect只能在控制器中的方法中生效。
如果需要可以通过抛出异常的方式实现跳转:
public function redirect(...$args){
    throw new HttpResponseException(redirect(...$args));
  }
//把需要跳转的地址传入作为参数即可。
3-10 左侧菜单排序以及图标处理
->order('id', 'desc')可以按照 id 进行倒序排序。如果发现图标无法显示,而是显示字符,可能是因为系统自动转义了,我们可以使用 raw 过滤规则来避免转义。
例如:
{$data.iconfont|raw}
知识点链接:链式查询 order
知识点链接:TT 开发-使用函数 ⭐ 很重要,可以实现高阶操作,其中 5-1 中也有用到
5-2 优惠券管理
strtotime()函数
将任何字符串的日期时间描述解析为 Unix 时间戳。
时间数据添加入库的时候,是需要把类似 2020-05-20 12:12:12 的字符串转成时间戳再入库的,就会用到上面函数。
6-3 图片上传验证
应用异常处理类为app\ExceptionHandle.php,可以自己添加异常处理规则。
知识点链接:杂项-上传
6-4 图片实时删除
助手函数app()可以获得容器中的实例。
下面的这种对于地址的处理需要熟练掌握:
$path='public'.$path; // 拼接
$path=app()->getRootPath().$path;
$path=str_replace('\\','/',$path); // 替换
unlink()函数
删除一个文件。
知识点链接:unlink.php
知识点链接:杂项-上传
知识点链接:助手函数
7-2 公共方法:排序
涉及知识 jquery 状态监听,来实现数据的实时排序更新
知识点链接:jQuery blur() 方法
9-3 商品分类
无限极分类
涉及 PHP 无限极分类,可以根据关键词再单独学习。
主要要用到的知识为递归循环。
(方法是建立在对应的模型中)
展开折叠分类内容
用到 jQ 的基础知识,通过点击来控制内容的显示与隐藏。
9-5 商品分类的删除
whereIn 查询
例如:->whereIn('id',$childStr)
知识点链接:查询表达式
9-7 图片排序逻辑+商品分类联动效果
本章需要用到 jQ 的相关知识实现排序。
jQuery parent() 方法: 获取父元素;
jQuery prev() 方法: 获取前一个同级元素;
jQuery next() 方法: 获取后一个同级元素;
jQuery after() 方法: 当前元素后插入内容。
例如:
$(".prev").click(function () {
  var prev = $(this).parent().prev(); //1
  $(this).parent().after(prev);
});
通过这个实现了顺序的改变。
分类联动通过 JS 实现
需要补一下 ajax 资料,通过 get 发送数据并实时返回
根据第一个选择,发送一个 ajax 请求,来获取第二个选择,再根据第二个选择,发送 ajax 请求,来获取第三个选择。
9-12 商品添加-事务操作
事务操作主要用于同时添加数据到多个表时,如果后面的添加操作失败时,把前面的操作也一起撤销掉。
(不然部分操作就会出现重复)
例如:
// 启动事务
Db::startTrans();
try {
    // 放入业务代码
    Db::table('think_user')->find(1);
    // 提交事务(这句不能少)
    Db::commit();
} catch (\Exception $e) {
    // 回滚事务
    Db::rollback();
}
事务操作需要使用 InnoDB 引擎。
MySQL 的 MyISAM 不支持事务处理!
知识点链接:事务操作
9-21 商品列表实现
通过模型,实现了根据选择,来显示不同的列表内容。
9-23 商品列表搜索扩展-搜索器
这块有点难度,比较没听懂
知识点链接:搜索器
10-3 会员注册+validate 验证
TP6 自带验证器,直接调用就可以完成数据验证。
公共的部分可以用到验证场景,
知识点链接:验证器
10-7 php7 严格模式下的短信发送逻辑
短信实现模块重要步骤。
随机验证码生成后可以存入缓存,通过缓存获取并进行核对。
10-8 redis 介绍
Redis 支持数据的持久化,可以将内存中的数据保存在磁盘中。
需要先安装 Redis 扩展,如果是 Win 电脑,还需要启动 Redis 服务才可以。
可以动态切换缓存类型,例如:
// 使用文件缓存
Cache::set('name','value',3600);
Cache::get('name');

// 使用Redis缓存
Cache::store('redis')->set('name','value',3600);
Cache::store('redis')->get('name');知识点链接:Redis 简介
知识点链接:杂项-缓存
10-10 登录逻辑+微信登录准备
清空 Session 数据:session('sessionUserData',null);
微信登陆开放平台:https://open.weixin.qq.com
10-18 whereFindInSet 使用
FIND_IN_SET 查询,相当于 where 的高级版,只要满足一个条件都算。
比如根据 id 查询,可能表中有多个 id,但只要有查询的 id,都满足查询条件。
例如:
$noticeData=Db::name('notice')->where('type',1)->whereFindInSet('user_id',$sessionUserData['id'])->paginate(10);知识点链接:查询表达式